
In this tutorial I demonstrate that object-oriented programming can be used with embedded system using open source tools and the C++ language. Furthermore, I demonstrate the use of the STL library with C++11 features. Sneak peak, here, here and here.

I base this tutorial on the “Hello World!” project. I provide the following.
- An example to demonstrate the use of C++ objects and the use of Standard Template Library (STL). The library provides, among others, an abundance of generic algorithms and containers, which is always nice to have at your disposal.
- A Makefile that automagically finds appropriate C, C++, Asm sources. You can even use this Makefile as a template for your projects.
1. Prerequisites
- Ubuntu 14.04 LTS (x86 architecture).
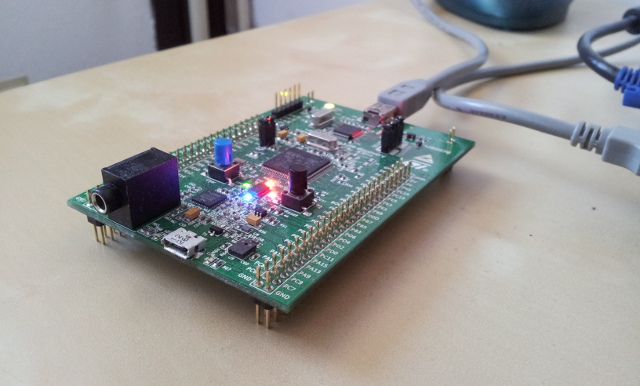
- STM32F4 Discovery Board (ARM architecture, costs less than 20 EUR).
- Complete the Template Project with Generic Makefile.
- Or at least go through chapter 2. Below is a quick-and-dirty instruction summary if you decide to stay on this page.
cd ~
# Remove the official package
sudo apt-get purge binutils-arm-none-eabi \
                   gcc-arm-none-eabi \
                   gdb-arm-none-eabi \
                   libnewlib-arm-none-eabi

# Add 3rd party repository
sudo add-apt-repository ppa:terry.guo/gcc-arm-embedded
sudo apt-get update
# Check the GCC package version in the PPA repository
sudo apt-cache policy gcc-arm-none-eabi

# Install software requirements
sudo apt-get install build-essential git openocd \
 gcc-arm-none-eabi qemu-system-arm \
 symlinks expect

# Clone my git repository & init submodules
git clone https://github.com/istarc/stm32.git
cd ~/stm32
git submodule update --init
2. Build the OOP Project
Build the OOP project using provided Makefile.
cd ~/stm32/examples/OOP

make clean
make release
#  text data  bss    dec   hex filename
# 96712 2324 3728 102764 1916c bin/outp.elf

sudo make deploy
You will notice the binary code increase roughly by the factor of 12 compared to the Hello world! project (100 KB). 😯 Despite of this, STMF4 Discovery has more than enough memory capacity to deploy the project. You may build with size optimization (-Os) as follows, which will decrease the code size to 76 KB. For more advanced optimizations, where I decrease the code size to merely 3.4 KB, see my next post.
make clean
make release-memopt
#   text data  bss   dec  hex filename
#  72232 2320 3696 78248 131a8 bin/outp.elf

sudo make deploy
Q: Deployment fails repeatedly due to some OpenOCD issue. 😦 Is there a workaround?
A: Yes, the current official Ubuntu package (Aug 2014) contains a prehistoric OpenOCD version. You should build a newer version from scratch. I provide step-by-step instructions here (2nd section, it takes less than 3 minutes to build it). When you are done, just return here and continue as nothing happened. It will work out of the box. 🙂
3. Object-oriented Programming
First, I copied and renamed Template Project with Generic Makefile‘s main.c file to main.cpp. To handle dynamic LED toggling I use TimeDelay class (defined in TimeDelay.h and TimeDelay.cpp, see the file tree structure below).
tree
# .
# ├── bin
# ├── inc
# │   ├── CMSIS/Include
# │   ├── stm32f4_discovery.h
# │   ├── STM32F4xx/Include
# │   ├── stm32f4xx_conf.h
# │   ├── stm32f4xx_it.h
# │   ├── STM32F4xx_StdPeriph_Driver/inc
# │   └── TimeDelay.h # NEW FILE
# ├── Makefile #UPDATED
# ├── src
# │   ├── main.cpp #RENAMED (main.c) AND UPDATED
# │   ├── misc.c
# │   ├── startup_stm32f4xx.s
# │   ├── stm32f4_discovery.c
# │   ├── stm32f4xx_exti.c
# │   ├── stm32f4xx_gpio.c
# │   ├── stm32f4xx_it.c
# │   ├── stm32f4xx_rcc.c
# │   ├── stm32f4xx_syscfg.c
# │   ├── system_stm32f4xx.c
# │   └── TimeDelay.cpp # NEW FILE
# └── stm32_flash.ld
The TimeDelay (see .cpp and .h code snippets below) object is used in the main function. It draws a (pseudo) random number from a given range. This values is in turn used as a delay function argument and it manifest itself as the LED toggling delay.
The TimeDelay class has the following attributes:
- The queue is a generic container from the standard template library (STL). When an object is instantiated, 4 unique delay values are inserted in the queue. When a process calls the getter function, the front item is removed from the queue and later returned.
- Mersenne twister pseudo-random number generator (prng) is used to generate a (pseudo) random number between 0 and 0xFFFFF and insert it at the beginning of the queue. No coding whatsoever was needed for the PRNG implementation. I simply used the appropriate PRNG template provided by the C++11 standard. C++ templates can really ease your life (if used carefully)! 🙂
// From TimeDelay.h
#include <queue>
#include <list>
#include <random>

using namespace std;

class TimeDelay {
private:
        list<int> l;
        queue<int,list<int>> q;

        mt19937 prng;
        uniform_int_distribution<int> dist;

public:
        TimeDelay();
        ~TimeDelay();
        int get();
};
// From TimeDelay.cpp
TimeDelay::TimeDelay() {
        l = list<int> {0x3FFFFF,
                       0x7FFFFF,
                       0xBFFFFF,
                       0xFFFFFF};
        q = queue<int,list<int>> (l);
        dist = uniform_int_distribution<int> (0x1,
                                              0xFFFFFF);
}

TimeDelay::~TimeDelay() {
}

int TimeDelay::get() {
        int retVal=q.front();
        q.pop();
        q.push(dist(prng));
        return retVal;
}
4. C++ Pitfalls in Embedded Software Design
On the one hand, the C++ language offers numerous benefits compared to the C, among others it is object-oriented language, supports exception handling, enforces compile-time type checking, supports generic programming through templates and comes with a large standard template library (STL).
On the other hand, these features come at a certain price. Some are more expensive than others in terms computational- and space-complexity. Furthermore, these features may reduce timing predictability, which is problematic for hard real-time systems, where missing a deadline leads to a total system failure. Troubles can even go from bad to worse! Some problems may manifest in run-time rather than compile-time (e.g. dynamic memory fragmentation), so use C++ features with care and when appropriate.
5. Further Reading
Check “Five [Debunked] Popular Myths about C++” by Bjarne Stroustrup and learn some new C++11, C++14 features. [1, 2, 3]

Hi Iztok,
thank you for this great looking tutorial! I tried to follow it and I successfully built my binary of the OOP example.
When it comes to flashing I tried to follow your way of updating openocd in the in-circuit-debugging-tutorial and it worked.
“openocd –version” gives me 0.9.0-dev-00161-g9c47dc9 (2014-10-01-19:01)
Although: When I do “make deploy” I get the same error as if no Board is connected at all:
http://pastebin.com/gjXv7GwE
with the important lines:
Error: open failed
in procedure ‘program’
in procedure ‘init’ called at file “embedded:startup.tcl”, line 459
in procedure ‘ocd_bouncer’
in procedure ‘transport’
** OpenOCD init Failed **
dmesg | grep usb shows me that the stm32 is found twice because I connected both USB.
I’m on Ubuntu 14.04 LTS 64bit.
Can you please give me any hint?
Update:
I red you first “Hello World” Tutorial and saw that you do the openocd-call with sudo.
After trying it “sudo make deploy” it works perfect!
Thank you soo much for these tutorials! I will give more feedback when I managed to write my first little embedded-program 🙂
Hi Dennis,
I am glad you found the solution by yourself.
Depending on your host system settings OpenOCD may connect to the STM32F4-Discovery board without superuser privileges (i.e. /wo sudo). However, after the blog was posted, I realized this is not enabled by default, so thx for pointing this out. I will fix it. 🙂
PS. You may use the OOP project as a template project. Just add appropriate files in the src and inc folders. It will build automagically. Or you can start from scratch using the project wizard. 🙂
PPS. I also recommend you to try the VirtualBox image with already set up development environment (be sure to check out test automation via BuildBot).
Hi Iztok,
I tried to Debug using QTCreator instead of your Eclipse solution and had trouble because Terrys PPA gcc-arm-none-eabi=4-8-2014q2-0trusty10 was built without python.
I raised a question on launchpad and he built a new version trusty11 within hours where Python is enabled in GDB.
Just wanted to let you know that there is a new version available now.
Here was my question which might contain interesting links on how to set up the Debugger in QTCreator or other IDEs: https://answers.launchpad.net/gcc-arm-embedded/+question/255548
BTW: Can I send you Text/Code in another way than wordpress-comments? 😉 I used your excellent tutorials to write a non-blocking RS232 communication fifo queue and want to share with you if you are interested. I’m not the guy to start another STM32 blog.
Thanks again for your great tutorials!
Hi Dennis,
Thanks for the feedback and the info regarding the gcc-arm-none-eabi package version number. I have already updated my posts and some files in the repository.
I encourage you to share your code. It may be useful to others. 🙂 Just fork my stm32 git repository, clone it to your local environment, add your code, commit and push back.
Then you can send me the link to your repo and I will open a special “3rd Party Examples” section to add your project. 🙂 Soon, I will provide a tutorial on how to do this in less than 30 minutes.